I apologize for not posting any updates in literally years. Now my custom domain actually has expired, so if you're still with me, thanks for hanging in there.
Due to me working long hours and still having most of my cake decorating stuff in storage from moving house, my poor blog and YouTube channel have been all but abandoned.
I figured I would share my favorite cornbread recipe since it’s quick, easy, and gluten free, even though we’re no longer in “cold weather comfort food” season. But hey, it freezes well.
So, if you have a minute to spare and would like to see how I make cornbread (gluten free, of course!) then please check out the video below.
If you didn't already know, Betty Crocker does gluten-free cake, cookie, and brownie mixes now. Actually, these have been around for a while, but I'm honestly not a fan of Betty Crocker. Or cake mixes in general for that matter. But if I have to use a cake mix, I'm more than likely not going to eat it, so I usually go for Duncan Hines if it's on sale or Pillsbury, whichever is cheaper.
A few days ago I realized that February is half over and I hadn't posted anything since January, so I decided to try out the box of Betty Crocker Gluten Free Devil's Food cake mix that had been sitting in my pantry for many weeks. I bought it on sale to use for something, I forget what, that I obviously never used it for. I was also in the mood for something chocolate. And easy. Cupcakes made from a mix are quick and easy.
This is a standard-size box of cake mix, yet it only makes a single cake layer or 12 cupcakes. So, not only is it twice the price of regular cake mix because it's gluten free, but it only yields half as much. That's really more like it being 4 times the price, when you think of it. Those of us on a gluten-free diet who want the occasional treat must pay dearly for it--either out of pocket for the gluten-free version or in misery if we indulge in the real thing.
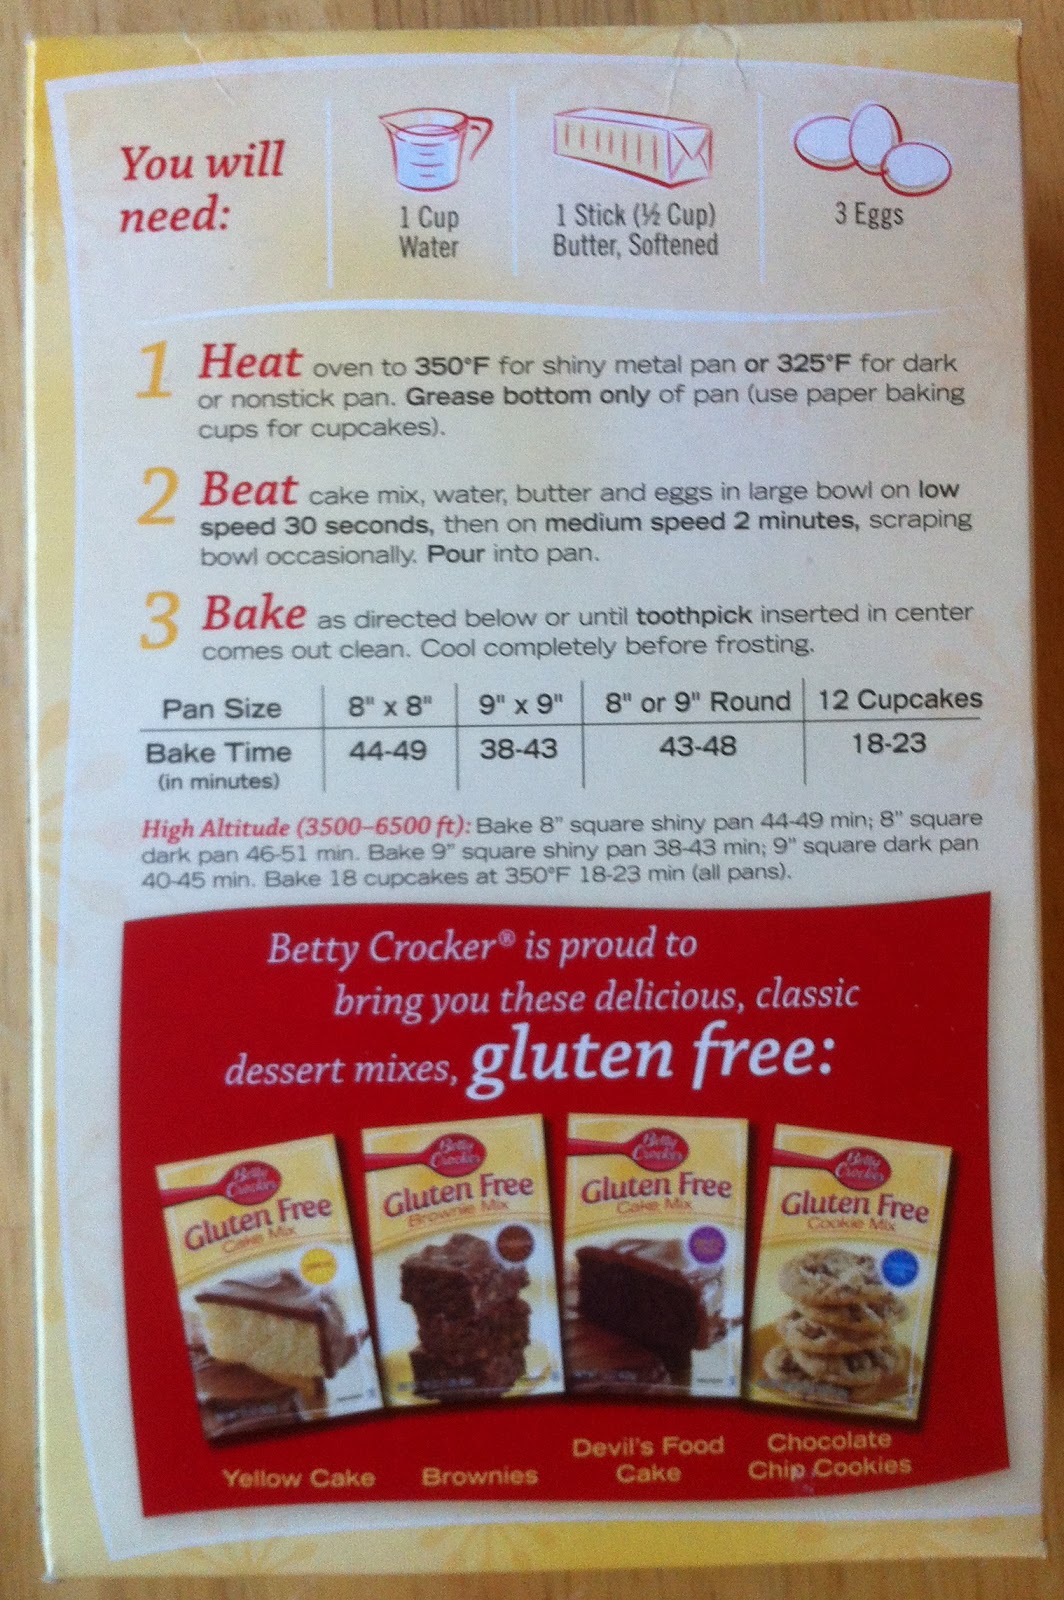
Other than the smaller yield and the use of butter instead of oil, the method is the same as regular cake mix. Add 3 eggs, a cup of water, and a stick of softened butter.
Make sure the butter is really soft, or maybe even think about melting it. I say this because despite my stick of butter sitting out on the counter all morning, it still wasn't soft enough to properly blend into the mix. The super cool thing about cake mixes, though, is that they're really hard to mess up. So, these cupcakes came out fine except for little holes on the surface of some of the cupcakes. But icing covers stuff like that up anyway.
The batter easily filled my all 12 cavities in my cupcake pan, and I had batter left over. I didn't want to over fill the cupcakes, so I spooned the extra into my mini-muffin pan. I ended up with 12 cupcakes and 16 mini cupcakes. The little ones turned out to be the perfect size for taste testing, and most of them were gone before I managed to get any icing made.
The cupcakes overall came out really dark, and the centers mounded up while the edges didn't rise much. When I bake cupcakes from a regular box of cake mix the tops usually come out flatter. I will say that the texture is pretty good. It's spongy rather than crumbly, and these cupcakes are more dense and dry than the light, moist texture you get with regular cake mix. Still, for gluten-free baked goods, they have a nice texture, and it's not at all grainy.
Unfortunately, they don't taste that great. They're super sweet and not very chocolaty. These cupcakes really just smell more like chocolate cake than taste like it. If you notice from the picture showing the box side, the first ingredient in this cake mix is sugar. Gluten is bad, especially for those of us with intolerances, but sugar is evil. And these cupcakes have more sugar in them than anything else.
To compensate for the lack of chocolate flavor, and since I didn't want to add any more sweet in the way of a sugary frosting, I decided to make some ganache for icing. I went for a vegan version (I used almond milk), because my body doesn't like for me to consume a lot of dairy.
I dipped a few cupcakes in the warm ganache to give them a smooth, shiny top. I loved the look of them, but I quickly abandoned that method because it involved removing the paper baking cup, which leaves the sides and bottoms of the cupcakes exposed and likely to dry out. So, we ate those first.
Once the ganache had cooled, I beat it with a whisk to make it more fluffy and frosting-like so I could use it to ice the rest of the cupcakes. On some I piped the icing with a #1M tip. For the others I used tip #12 and then smoothed the ganache with a spatula. I uploaded videos to my YouTube page if you'd like to see how I did it.
There are many reasons people who wish to lead a healthier lifestyle chose to avoid gluten in their diets. Those with gluten allergies and intolerances, however, don't have a choice. For them, consuming undetected gluten poses a real health risk. The trouble is that traces of gluten can be found in foods that don't naturally contain it, due to cross-contamination, cooking methods, food additives, etc. This is especially true when it comes to restaurant and commercially processed food.
But the good news is that now there's a way you can check to be sure what you're eating is really gluten free. Boimedal Diagnostics has developed an easy-to-use gluten test kit, called GlutenTox Home, and they were nice enough to send me a sample pack to try. Along with a free pen!
Inside the box was two test kits, and I must admit I was a little surprised by the vials, pipettes, and sealed pouches. I don't know exactly what I was expecting, but with labels like "extraction solution" and "dilution solution" I felt almost scientific. Clearly this was more involved than just plunking a chunk of food into a beaker and seeing what happens.
I decided to test the Whole Foods instant oatmeal I had in my pantry. Oats are bad for cross-contamination, and I knew that when I bought this oatmeal, but the certified gluten-free oats are considerably more expensive, and rarely do you find them in an instant or quick-cooking variety.
I also wanted to test the fried rice from our local Chinese restaurant. They don't advertise anything as being gluten-free on their menu, but I've been wondering about their fried rice and really wanted to know if it was okay for me to eat it. I guess I should say for me to keep eating it, as I've consumed it in the past without noticing any ill effects.
The test is easy to do, but it does require multiple steps, and everything must be clean. You'll need a 1 gram sample (or 1 millimeter if it's liquid) of whatever you're testing, and it's best if you can grind the sample up as much as possible. I don't have a mortar and pestle, so I used the end of my small rolling pin. There's a handy chart in the instructions to help you figure out how much to use if you don't have a kitchen scale, but weighing the sample is best for accuracy. Also, really hard foods might need to be chopped into tiny pieces before attempting to grind them.
Once you have the sample ready, put it in the bottle with the yellow cap. This is the extraction liquid. Replace the lid and shake vigorously for at least 2 minutes. The word vigorously is actually underlined in the instructions, so I'd say it's very important to shake the bottle really well. It counts as exercise, right?
After it's all shook up, let the solids settle in the bottom. The instructions say this should take around 5 minutes, depending on the sample. Then, the fun begins! Using a clean dropper, the next step is to transfer sample liquid from the extraction jar to the vial with the blue cap, which is a dilution solution.
In order to be labeled "gluten free" foods must contain no more than 20 PPM (parts per million) of gluten. This handy kit can detect the 20 PPM threshold, OR it can also test down to just 5 PPM. That's very useful for those who suffer severe gluten intolerances and allergies. I mention this now because in this next step you add 2 drops of the sample liquid to the dilution bottle if you want to test for 20 PPM. If you want to test to 5 PPM, add 8 drops. For both of my samples I tested for 20 PPM.
Once you have the sample liquid drops in the dilution solution, you need to shake the bottle gently for 15 seconds (make sure the blue cap is back on securely). Now it's time to open up the sealed pouch, which contains a clean pipette and the test stick. Make sure you use the new pipette for this step. Place 5-6 drops of the dilution solution in the "S" cup on the test stick. Wait 10 minutes. That's the only bummer. If you're hungry and need to test your food before you eat it, it's going to take you around 15-20 minutes to find out. By then you're dinner is going to be cold.
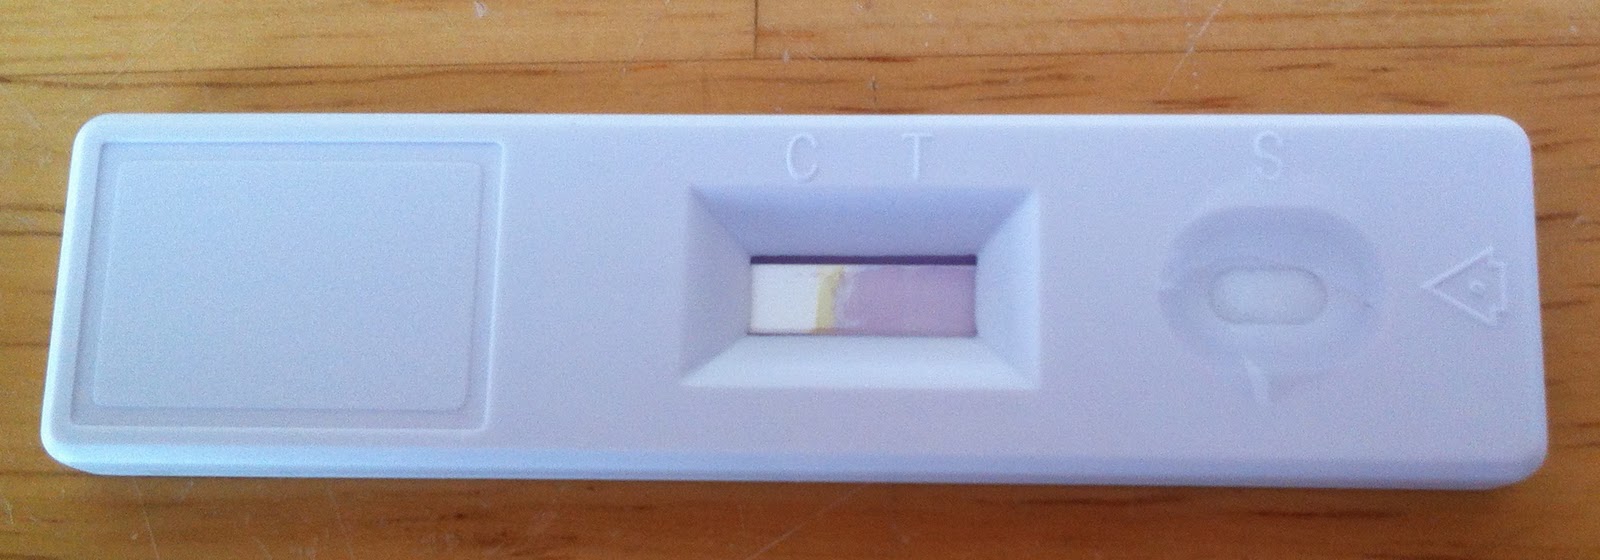
The test should be read right at 10 minutes, as waiting longer could skew the results. As with other types of home tests, there should be a line under the "C" to indicate that the test was done correctly. If there's no line there, then it's an invalid result. If there are two lines, then that indicates a positive result for gluten to whichever threshold you tested. Any line under the T is a positive result, no matter how faint. As you can see above, the line isn't all that dark, so while the concentration of gluten is higher than 20 PPM, if there had been a really high quantity of gluten in the sample then the line would be darker.
I actually took a lot of pictures when I was testing the oatmeal and fried rice (I keep mistyping that as friend rice for some reason, so if I missed a typo please let me know). There were too many photos to include them all on this blog post, so I have them posted on Photobucket, where you can view them as an album or slideshow.
Last year on New Year's Eve I posted my top 5 favorite recipes I made in 2010, and I'd like to do the same for 2011. I actually intended to share more recipes this year, and more regularly, so I apologize for the lapses in blog posts here and there. Often I make something new, really like it and want to post the recipe, but then I never quite get around to making the same thing again or don't have time to take all the pictures. Then there are times when I decide to make a recipe specifically for a blog post, and it's disappointing. Sometimes I go ahead and share the recipe anyway, especially if I think I did something wrong or I feel like I'm long overdue for a post. Maybe in 2012 I'll have enough to do a top 10, but this year I'm sticking with just 5.
I would like to point out that the gluten free chocolate chip cookies from Elana Amsterdam's Gluten-Free Almond Flour Cookbook is a recipe I featured this year, and it's without a doubt a favorite and possibly the recipe I make most often, but I've been making it since 2010, so I didn't consider it for the top 5 of this year. Also, I didn't consider any recipes that aren't gluten-free. These are MY favorite recipes, after all; I have to be able to eat them. So, without any more rambling, here's the countdown of my 5 favorite recipes of 2011.
Number 5 is the gluten-free Strawberry Shortcake I made for the Driscoll's Strawberry Shortcake Day promotion. These are definitely best consumed the same day they're baked. They get stale very quickly. I did more than just top them with strawberries, though. I also enjoyed them with lemon curd and raspberries, and they're also pretty dang yummy smeared with Nutella.
5. Strawberry Shortcake
The gluten free Mud Pie was really an experiment, and I was pleased enough with the results to consider it number 4. I know it doesn't look all that appetizing, and I do want to make this recipe again, just to see if I can improve its appearance. The crust is yummy and works with any kind of filling, so it's a great recipe to know.
In 2nd place is the Nutty Crust Peach Pie. Here's an example of a recipe that didn't come out very well, due to the burnt crust edges, and me subbing some pecans for almonds didn't work out quite as well as I'd hoped. Peaches and pecans go together fine, but this crust got soggy on me, and it that's not been an issue when I use all almonds. Still, it was delicious.
2. Nutty Crust Peach Pie
There's a reason I went ahead and posted that cornbread recipe yesterday, even though I didn't have step-by-step photos, or really any decent pictures of the cornbread muffins. I had to get that recipe up because it's my top number 1 favorite of 2011. Here again, I like the way I made it better, but I'm not all that fond of sweet cornbread, especially when I want to make stuffing with it.
1. Cornbread
I want to know about other great recipes people made this year, gluten-free or not. Do you have a list of favorites? Please comment and let me know.
I have a thing about cornbread. I used to work at a bakery that made the best cornbread ever. It was a Friday thing. They didn't make cornbread any other day of the week, which was lucky because that meant I could only get it on Fridays, thereby limiting my consumption. I have no clue how they made it, and the bakery closed down years ago. I've been on the search for cornbread that good ever since. I still haven't found it, but I think this recipe comes pretty close, with my tweaks.
Depending on how you make it and the type of cornmeal you use, cornbread can be sweet or not, really coarse and crumbly or more fine and cake-like. Of course, nowadays I need gluten-free cornbread, which is no problem as long as the recipe only uses cornmeal and doesn't call for any flour. Turns out, that's easier said than done if my online search for "cornbread recipe" is anything to go by. That's why I latched onto this recipe--it's made with just cornmeal, no flour required. I saw that it called for 1/3 cup of sugar, and I was looking for a savory cornbread recipe, but I figured I could always use less sugar, or none at all. I also didn't have enough vegetable oil. You need a full cup for this recipe, and all I had in my pantry was 3/4 cup, so used 1/2 cup of melted butter instead of just 1/4 cup to compensate.
The main reason I wanted cornbread is because I was cooking a turkey and wanted to make dressing. I live in the south, and we make dressing with cornbread. At least, that's what I grew up eating, and I really don't like any other kind of stuffing/dressing. In order to make good dressing, you have to start with good cornbread. Trust me on this one. I once ate dressing that was made with sweet cornbread, and it did not taste good. Dressing is a savory dish, after all. One year, I tried making dressing using cornbread made from Bob's Gluten Free Cornbread Mix, and because the cornbread itself had an aftertaste, so did the dressing it went in. But the superlative cornbread from Beckers (see note, below) always made such delicious dressing.
I baked this cornbread without any real expectation of greatness, but still hoping that it would taste good so my dressing would be edible. Thank goodness it's delicious. The recipe yields 12 standard-size muffins, and three quickly disappeared before I even got the celery and onions started, so I had to tell the cornbread lovers of the house not to eat any more until I had the dressing made. Luckily, there were a few left over, but they didn't last very long. The next day I got some more vegetable oil, and I decided to make the cornbread again, this time following the recipe exactly, and I didn't like it quite as much. This is mostly because I used the full 1/3 cup sugar, and that made the cornbread a little sweet, which I don't like. The second batch of muffins were less buttery, but I suppose that's to be expected since I didn't use as much butter.
I'm sorry for not having any pictures to post of the recipe in progress, but I honestly didn't even think to take any. Besides, I wasn't sure if this recipe would be blog-worthy, and I was far too busy with other things on the go in my kitchen at the time.
Also, the recipe calls for self-rising cornmeal, which I didn't have. Thanks to the wonders of the Internet, I was able to figure out how to use regular cornmeal by adding baking powder and salt to it. If you use self-rising cornmeal, then stick with the quantities listed in the original recipe.
2 cups + 2 teaspoons cornmeal
2 1/2 Tablespoons baking powder
1 teaspoon + a pinch of salt
3 Tablespoons sugar
4 large eggs
3/4 cup vegetable oil
1/2 cup buttermilk
1/2 cup unsalted butter, melted
Preheat oven to 425 degrees and spray the cavities of a 12-cup standard muffin pan with nonstick cooking spray.
Combine the dry ingredients and whisk to blend. Make a well in the center.
Beat together the eggs, oil, buttermilk, and melted butter. Add to dry ingredients and whisk until well blended.
Pour into muffin pan and bake 15 minutes. They are delicious warm.
About Beckers: There is still a Beckers Bakery in the Nashville area, but that's not where I worked and got the awesome cornbread from. I don't know if the two bakeries shared recipes or not (they had different owners who were somehow related, I think), and I don't know if the Beckers on Lebanon Pike even sells cornbread. I tried calling them to ask, but of course they're closed until after New Years. Does anyone who lives on that side of town know?
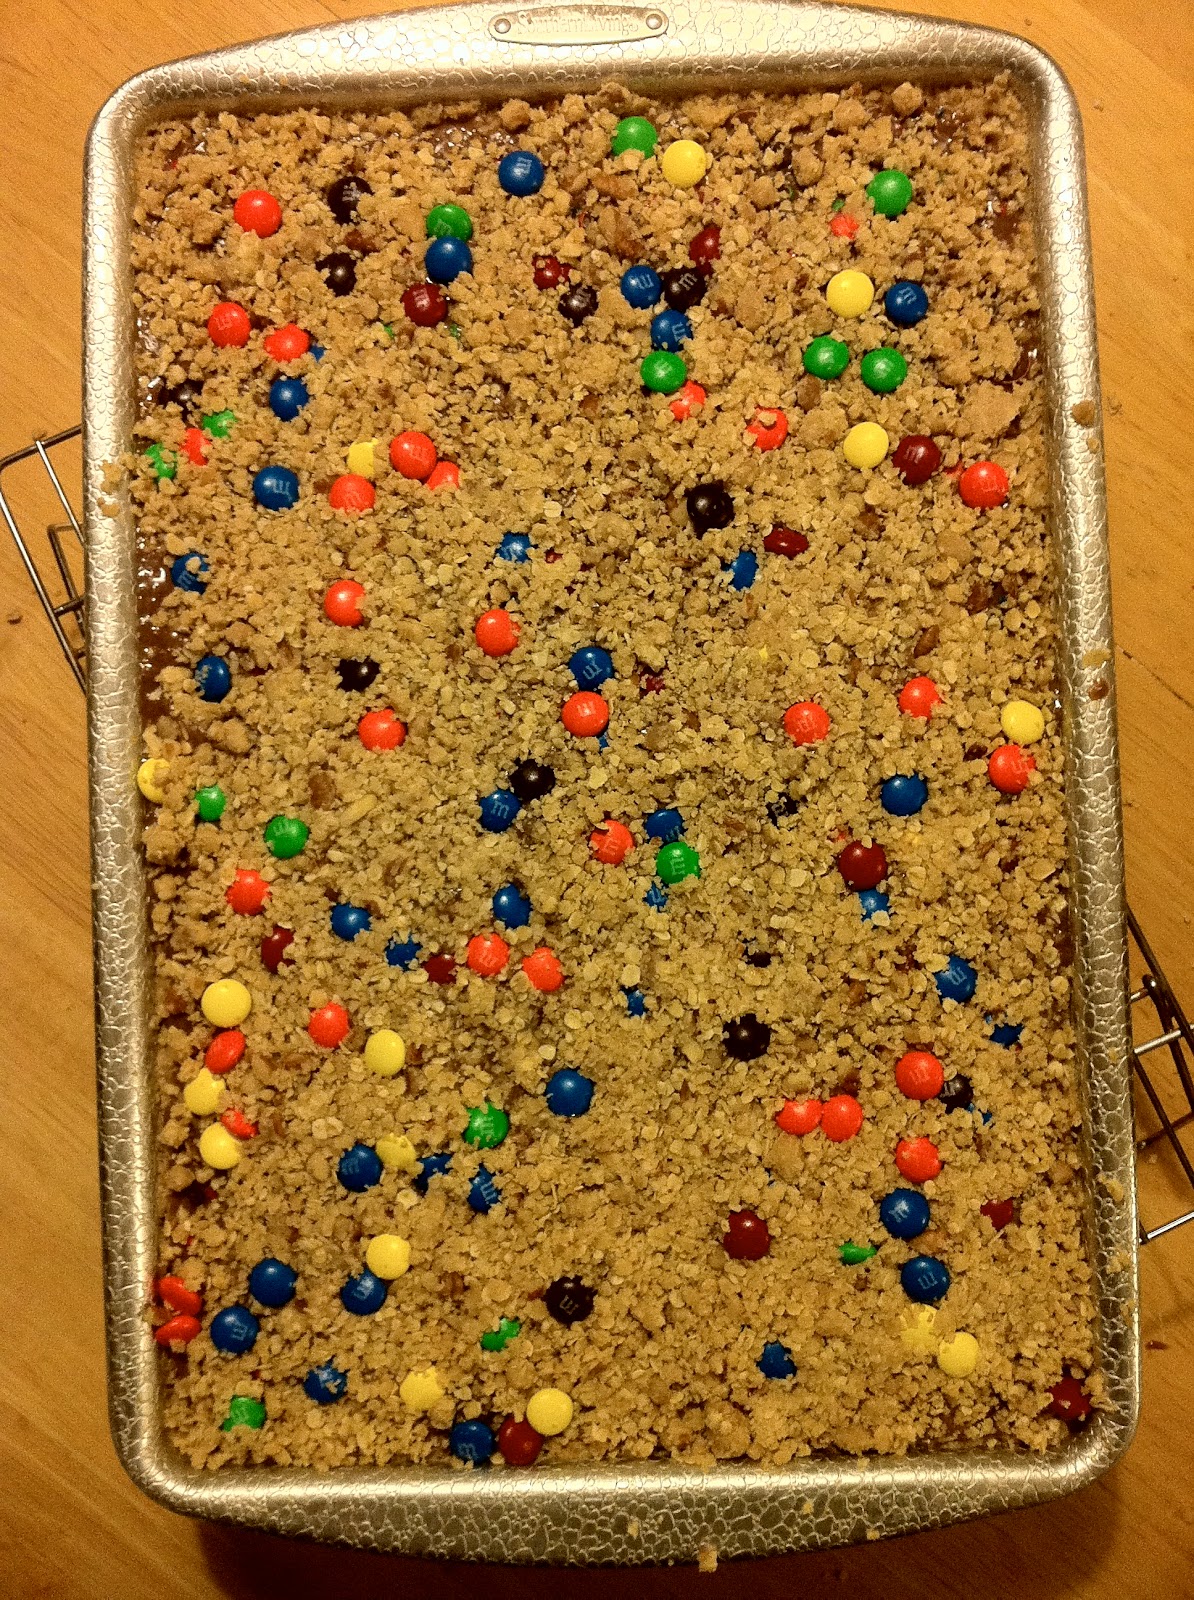
Before I went gluten-free, Chocolate Candy Oat Bars were my favorite cookies to make during the holidays. These are basically a crumb-type base that's baked and then spread with a sweet chocolaty filling and then topped with more crumb and candy coated chocolate pieces (aka M&M's). More than once I ended up making two batches because I would consume most of the first round, leaving none to share. Having taken a few years off from making this recipe, this year I decided to try it using gluten-free flour.
The recipe only calls for 1 1/2 cup of flour, and I had just over that amount left in my box of King Arthur Gluten Free Multipurpose Flour, so that's what I used. Ideally, I should have also used certified gluten-free oats, but I need quick-cooking oats to make this recipe, and I had a difficult time finding them. They are available on amazon.com, but I didn't want to wait for an order to arrive, so I went with just regular quick-cooking oats instead. Inherently oats don't contain gluten, but cross-contamination is a concern.
For the Chocolate Candy Oat Bars:
2 cups quick cooking oats
1 1/2 cups all-purpose flour (I used the gluten-free King Arthur flour mentioned above)
1 cup firmly packed brown sugar
1 cup chopped pecans
1 teaspoon baking soda
1/4 teaspoon salt
2 sticks (1 cup) unsalted butter, melted
1 1/2 cups candy coated chocolate pieces, divided
1 (14-ounce) can sweetened condensed milk
Preheat oven to 375 degrees and spray a 10" by 15" jelly roll pan with nonstick cooking spray. If you don't have a jelly roll pan, a 9" by 13" sheet pan works. You'll just have thicker cookies.
In a large bowl, whisk together the oats, flour, brown sugar, chopped pecans, baking soda, and salt. Add melted butter, stir together until mixture is crumbly.
Reserve 1 1/2 cups of the pecan crumb mixture. Press the rest evenly into the bottom of the prepared pan. Bake for 10 minutes, remove from oven, and cool. Reduce oven temperature to 350 degrees F.
In a microwave safe bowl (I just used a glass measuring cup), microwave 1 cup of the chocolate candy pieces, on high for 1 to 1 1/2 minutes, stirring every 30 seconds. Press candies with the back of a spoon to mash them, and then stir them into the condensed milk.
Spread the chocolate mixture evenly over the prebaked crust, leaving about half an inch border on all sides. Combine remaining 1 1/2 cups of crumb mixture and the rest of the chocolate candy pieces. Sprinkle over chocolate mixture and press lightly.
Bake for 18-20 minutes, or until golden brown. Cool completely before cutting into bars. I'm really sorry, but I totally forgot to take a picture of the cut cookies so you can see the layers and yummy goodness.
I must say that they're a lot sweeter than I remember. Maybe my taste preferences have changed since I don't try not to consume as many sweets nowadays. The gluten free flour did give these more of a grainy mouthfeel than I remember, but I don't know if you would necessarily notice unless you had a batch made with regular flour to compare them with. Overall though, I think they came out just fine.