Showing posts with label review. Show all posts

Thursday, February 16, 2012

Betty Crocker Gluten Free Cake Mix and Easy Cupcake Decorating

If you didn't already know, Betty Crocker does gluten-free cake, cookie, and brownie mixes now. Actually, these have been around for a while, but I'm honestly not a fan of Betty Crocker. Or cake mixes in general for that matter. But if I have to use a cake mix, I'm more than likely not going to eat it, so I usually go for Duncan Hines if it's on sale or Pillsbury, whichever is cheaper.

A few days ago I realized that February is half over and I hadn't posted anything since January, so I decided to try out the box of Betty Crocker Gluten Free Devil's Food cake mix that had been sitting in my pantry for many weeks. I bought it on sale to use for something, I forget what, that I obviously never used it for. I was also in the mood for something chocolate. And easy. Cupcakes made from a mix are quick and easy.
This is a standard-size box of cake mix, yet it only makes a single cake layer or 12 cupcakes. So, not only is it twice the price of regular cake mix because it's gluten free, but it only yields half as much. That's really more like it being 4 times the price, when you think of it. Those of us on a gluten-free diet who want the occasional treat must pay dearly for it--either out of pocket for the gluten-free version or in misery if we indulge in the real thing.
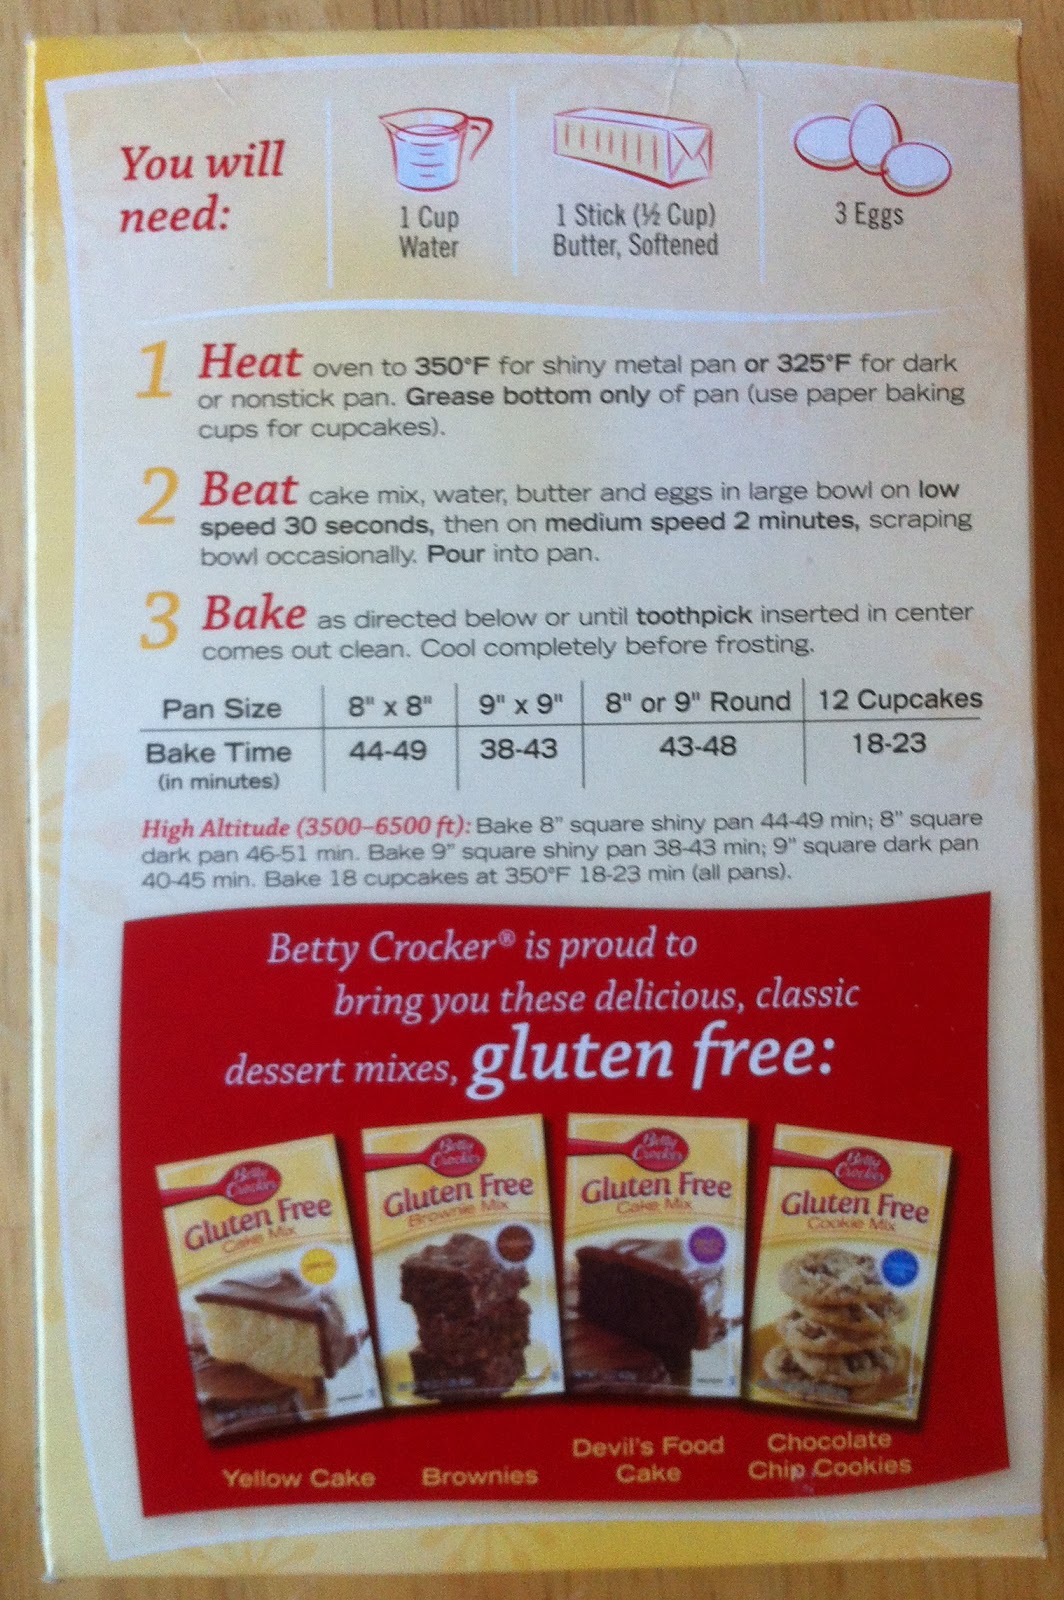
Other than the smaller yield and the use of butter instead of oil, the method is the same as regular cake mix. Add 3 eggs, a cup of water, and a stick of softened butter.
Make sure the butter is really soft, or maybe even think about melting it. I say this because despite my stick of butter sitting out on the counter all morning, it still wasn't soft enough to properly blend into the mix. The super cool thing about cake mixes, though, is that they're really hard to mess up. So, these cupcakes came out fine except for little holes on the surface of some of the cupcakes. But icing covers stuff like that up anyway.
The batter easily filled my all 12 cavities in my cupcake pan, and I had batter left over. I didn't want to over fill the cupcakes, so I spooned the extra into my mini-muffin pan. I ended up with 12 cupcakes and 16 mini cupcakes. The little ones turned out to be the perfect size for taste testing, and most of them were gone before I managed to get any icing made.
The cupcakes overall came out really dark, and the centers mounded up while the edges didn't rise much. When I bake cupcakes from a regular box of cake mix the tops usually come out flatter. I will say that the texture is pretty good. It's spongy rather than crumbly, and these cupcakes are more dense and dry than the light, moist texture you get with regular cake mix. Still, for gluten-free baked goods, they have a nice texture, and it's not at all grainy.
Unfortunately, they don't taste that great. They're super sweet and not very chocolaty. These cupcakes really just smell more like chocolate cake than taste like it. If you notice from the picture showing the box side, the first ingredient in this cake mix is sugar. Gluten is bad, especially for those of us with intolerances, but sugar is evil. And these cupcakes have more sugar in them than anything else.
To compensate for the lack of chocolate flavor, and since I didn't want to add any more sweet in the way of a sugary frosting, I decided to make some ganache for icing. I went for a vegan version (I used almond milk), because my body doesn't like for me to consume a lot of dairy.
I dipped a few cupcakes in the warm ganache to give them a smooth, shiny top. I loved the look of them, but I quickly abandoned that method because it involved removing the paper baking cup, which leaves the sides and bottoms of the cupcakes exposed and likely to dry out. So, we ate those first.
Once the ganache had cooled, I beat it with a whisk to make it more fluffy and frosting-like so I could use it to ice the rest of the cupcakes. On some I piped the icing with a #1M tip. For the others I used tip #12 and then smoothed the ganache with a spatula. I uploaded videos to my YouTube page if you'd like to see how I did it.
 
Then I made some rolled fondant roses using various easy techniques, as well as simple blossom flowers and leaves using plunger cutters to decorate the cupcakes with. I also posted those videos to YouTube, so please let me know what you think.

Pin It

Monday, January 23, 2012

My Memories Digital Scrapbooking Software

Here's something new and exciting! Well, actually the My Memories digital scrapbooking software has been around for a while, but I only just recently found out about it, so it's new to me. Years ago I tried to get into the scrapbook craze, but that was back when I had a lot of photographs. When we got a digital camera, I no longer had actual prints to work with because my photos were either on a memory card or my computer. I'm super lazy (and cheap) so spending the money to have prints made and then taking the time to compile everything in a keepsake album was not a task that appealed to me.
With digital cameras being so affordable and readily available on most cell phones, hardly anybody takes pictures with actual film nowadays. My Memories allows you to create scrapbook pages with your digital pictures on your computer, and then when you're done, you order the printed scrapbook album.
You can actually do a lot more with My Memories than just make scrapbook pages, but to be honest, I haven't had the chance to explore all the other options like cards and videos yet. I've been far too busy just playing around with making album pages using pictures of my cakes and other creations. I'll post some of the screen shots here, but you can view them all on Photobucket, either as an album or slideshow.
Basically, there are ready-made templates you can use which are very customizable, or you can start from scratch (I haven't had the courage to do that yet). Adding photos to the pages is super simple: just drag and drop. There are plenty of background choices, including different colors, papers, textures, and even the option to use your own pictures as a custom background. The journalling areas are preset on the template pages I've worked with, but you can change their size, shape, and even add more or remove them altogether. You can also get as creative as you like with the text options, and there's a cool feature called Word Art that's super fun to play around with.
But that's not all! There are many add-on kits you can get from the online design shop, some are even free, so I seriously doubt anyone would ever run out of options. If scrapbooking is a hobby you enjoy, why not take My Memories for a test drive and see for yourself? You can download a free trial on the website, and if you do, please let me know what you think. Alternative, you could play around with the Online Photobook Creator. Trust me, you don't have to be tech-savvy or a graphic design guru, as the software is very intuitive, and there are plenty of resources to help you out, including online tutorials, YouTube videos, and a blog which features weekly challenges to give you even more ideas and inspiration.

As if that's not enough, the really cool thing is that I'm hosting a giveaway for the My Memories digital scrapbooking software. Yes, one lucky person will win My Memories Suite Version 3! Entering is easy, thanks to the wonderful widget known as Rafflecopter. For those who can't wait for the giveaway to end and must have My Memories right now, you can save $10 on your purchase with coupon code STMMMS90048.
a Rafflecopter giveaway

If the Rafflecopter widget isn't loading, try refreshing the page. If it's still not showing up, please let me know either via email (cakedarla at gmail dot com) or Twitter (@cakedarla). Thanks!

Saturday, July 2, 2011

Namaste Foods Gluten Free Bread Mix

Recently I made a loaf of bread using a bag of Namaste Foods Gluten Free Bread Mix. I bought this on sale at some point, and it subsequently sat in the pantry for a while. I'm not sure how long, but there's another 8 months to go until the use-by date, so I'm not worried. I like to have stuff like this on hand because sometimes I get in the mood to eat bread, and that usually means I have to make it myself. This time, I was also in desperate need of clearing out some pantry space, so making this mix was the easy answer.

This is the third loaf of gluten free bread I've made from a mix (Pamela's and Bob's Red Mill were the other ones I tried), and it did fairly well. It rose way more than I thought it would, but it was still heavy and moist the first day, only to very quickly dry out by the third day after baking.
  
The bread mix consists of a flour blend made from brown rice flour, sorghum flour, tapioca flour, arrowroot flour, rice milk powder, evaporated cane juice, millet flour, salt, xanthan gum, and a separate packet of yeast is also included. All you need to add is 1 egg, 3 egg whites, 1/4 cup of oil, and 1 cup of warm water.
 
Add the yeast to the water and give it at least a good 5 minutes to dissolve and proof. I was actually quite worried because after 20 minutes mine still didn't look all that active, but I went a head and used it and the bread rose just fine.
  
Combine the egg, egg whites, and oil. Add the yeast, and then the package of flour blend. Beat for 3 minutes with an electric mixer on medium speed, scraping the bowl down as needed.
   
Spray a bread pan with nonstick cooking spray, and if you're not using your oven to let the dough rise, you can go ahead and let it start preheating to 350 degrees. Pour the bread dough (it's more like quickbread batter) into the pan. Cover loosely and let rise for at least 30 minutes. It doesn't double, but you can see it clearly does rise, just compare the pictures above to those below.
 
By the way, I was too lazy to look for couldn't find my loaf pan, so I used one of these casserole dishes because it was the first baking vessel I could access without potentially disturbing a precariously stacked tower of teetering crockery and bakeware. It worked out great--I used the lid to cover the dish for proofing, and then again during baking so the top wouldn't over brown. Well, at least not much... And here's the finished product. I was very pleased to see that it rose even more during baking.
    
I apologize for not having any pictures of the inside of the loaf. I kept meaning to take some, but I seemed to either not have my camera handy when I was slicing the bread, or my kitchen was way too dark. But the crust is more flaky than crusty, and the inside has a coarse crumb, like most gluten free bread, even though the flour blend was fairly fine.

For me this bread was moist on the day of baking, but soon developed a more cornbread-like texture and quickly dried out. It has a deeper flavor than regular bread, and it goes well equally with sweet or savory toppings. I tried it with cheese and Branston Pickle, lemon curd, and honey. It worked well with all of them.