There's a really cool cake decorating supply store in Nashville called
Sweet Wise. They have an enormous selection of cutters, candy molds, cake pans, and all that groovy kind of gear. They also offer classes, and the owner has a
blog where she posted this recipe for her
basic cookie dough. This dough can make classic roll-out cookies in addition to four other treat ideas, so I decided to try it.
I didn't have the almond oil essence or whatever it called for, so I used 1/4 teaspoon of pure almond extract instead. Also, these aren't gluten free because they aren't for me. In fact, probably any recipes I post between now and the end of the year will be for holiday treats, which most likely won't be a healthier redux or gluten-free. Hey, it's the holidays, after all, and this way I won't be tempted to eat them.
Ingredients:
1 1/4 cups (2 1/2 sticks) butter, softened
2 cups sugar
2 eggs
1 1/2 teaspoon Vanilla Extract
1/4 teaspoon
5 cups all purpose flour
2 tsp baking powder
1 tsp salt
1/2 cup milk
Combine flour, baking powder, and salt in a bowl and set aside.
Cream butter and sugar in mixing bowl until fluffy.Add eggs and flavorings and mix well.
Add the dry ingredients a little at a time, alternating with the milk until all have been incorporated. Now, the recipe doesn't say to chill the dough before use, but I made mine a few days ahead of time. Rather than roll the dough into a ball, I prefer to divide it in half, and pat it out into a flat round between wax paper. That way, I can store it flat in the refrigerator until I'm ready to use it, and it's already half-way rolled out.
When ready to use, roll out the dough 1/4 inch thick, cut into desired shapes, and place on baking sheets lined with parchment paper. Bake for 9-11 minutes, or until just starting to brown on the edges, in a 375 degree oven. Allow to cool completely before decorating.
Now, whenever I have to roll out any kind of dough, I really prefer to roll it out between sheets of wax paper. This saves flour and mess.
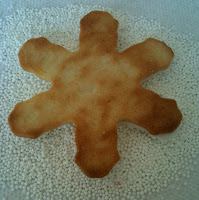
But that doesn't work with this dough. No matter how chilled it is, it sticks to the wax paper, and it's really too soft to hold its shape when baked. This recipe tells you to roll out the cookie dough on a floured surface, and it definitely needs that floured surface. The flour gets worked right into the dough and makes it easier to handle, and the dough holds its shape much better.
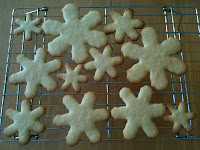
I used 1/4-inch
spacers on my
rolling pin and cut some snowflakes with my
nesting snowflake cutters. The smaller ones bake more quickly. I finally wised up and started pulling them out of the oven a minute or so early, but quite a few got over baked before I figured this out.
I have some new rolled fondant I've been wanting to try in addition to some
buttercream
so I decorated the snowflakes a few different ways.
Some just got covered with rolled fondant and made into a snowflake tree:
This is actually really easy, as it uses the same cookie cutter you used to make the cookies. Just smear some buttercream on top of the cookie--this doesn't have to be pretty as it's only there to make the rolled fondant stick.
Pinch off a good handful of rolled fondant and knead until soft and pliable. Roll out the fondant to desired thickness, I used the 1/16-inch spacer rings on my
little rolling pin, but you can roll it out thicker if you want. Use the cookie cutter (after washing) to cut out a piece of fondant the same size and shape as the cookie.
Then it's just a matter of positioning the fondant snowflake on top of the cookie, and it's ready to go. You can leave them separate or stack them.
I realize that looks pretty plain, but
sprinkles
can help. I prefer to pour them onto a paper towel and spread them evenly out to an area as large as the cookie I'm working with. That way, when I'm done I can pick up the ends of the paper towel and funnel them into a plastic bag to save for later.
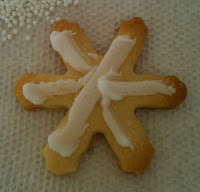
To add some outline sparkle to the snowflakes, I piped buttercream around the top edge of the cookie with a
#3 tip. This doesn't require precise piping skills since the piped lines will be covered up with the sprinkles sticking to them. Once you have the buttercream outline piped, go ahead and plant the cookie face-down in the sprinkles, because they'll stick MUCH better while the icing is fresh.
You can then add more icing to the center and dip the cookie again...
Or not even bother with the fondant, and just pipe some buttercream directly on the cookie top and dip it into sprinkles.
The smaller snowflakes are just the right size for that sort of treatment. Here are some more I made.
I'll need to talk about the other cookies I made with this batch of dough later because I haven't finished those yet.


2 comments:
I think these look fantastic might try, great instructions
Thank you! Bakery Crafts Ice 'n Easy is similar to Regal Ice, only not *quite* as good. It's a little too sweet but easy enough to handle. We call it "rolled fondant" over here in the US. :)
Post a Comment