Showing posts with label raw. Show all posts

Monday, March 7, 2011

Raw Chocolate Bomb

This is actually an Italian Chocalate Almond Zucotto, but I'm calling it Raw Chocolate Bomb instead. I was trolling around different websites looking for a recipe that was gluten-free, preferably raw because I had dates in my pantry that needed to be used, and it HAD to involve chocolate. I decided to make this because of the enticing picture, knowing that mine most likely wouldn't turn out that pretty, and it didn't.

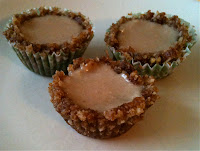
I use my iPhone to take photos for this blog. There's no flash, so lighting can be a challenge. I always try to do my baking and picture taking during the daytime, but on the day I made my chocolate bomb it was really dark and rainy outside. The lights in my kitchen can make weird glares and orangish hues, so please forgive the poor quality of the photography. I took the above photo this morning because there was some decent sunlight coming into the kitchen, so it's a little better than the rest.

Another reason my chocolate bomb didn't turn out looking like the original zucotto is because I didn't bother dusting it with carob powder and garnishing with almonds. I don't have any carob powder (I used all cocoa powder instead), and I didn't have any whole almonds left.

This recipe has three components: the cake, almond cream, and chocolate cream. They're layered inside a bowl or pudding basin and then chilled in the refrigerator or freezer to set. Once firmed up, you then place the bowl upside-down on a plate, and remove the bowl to unmold the the chocolate bomb. That's simple enough. Everything is made using either a food processor or a blender, so measuring out the ingredients and washing up the utensils takes longer than actually assembling the dessert.

I have to confess that my version isn't truly raw, as the chopped almonds I used were toasted. Also, the recipe calls for melted coconut oil. I'm not sure how else to melt coconut oil besides heating it, which is cooking, right? That part kind of confuses me, but since coconut oil has a pretty low melting point, maybe it's not heated enough to be considered cooked.

The recipe description mentions a "hint of orange" in the cake. Rather than actually measure out 1/2 teaspoon of orange zest, I just took the zest off of an orange. I think that was too much. My cake has way more than just a hint of orange in it.

Also, I made the almond cream in the blender, and I think next time I'll use my food processor, at least a first. My blender had difficulty mixing the ingredients as the mixture was pretty thick, so I found myself adding more almond milk than I should have, and it came out too runny. I fixed this by putting it in the freezer to chill, and as it thickened I was able to spread the almond cream up along the sides of the bowl more. But I'm going to quit rambling now and get on with the recipe and pictures.

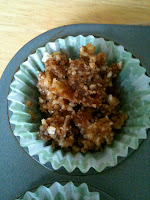
The first thing you want to do is line a 1 quart bowl with cling film (aka plastic wrap). This makes it easy later.

For the cake:
1 cup walnuts
2/3 cup almonds
1 cup pitted dates, packed
1/2 teaspoon orange zest
1/2 teaspoon pure vanilla extract
In a food processor, grind the almonds to a fine powder and set aside in a separate bowl. Then process the walnuts into small, crumb-like pieces and add them to the almonds.
  
Next, process dates, orange zest, and pure vanilla extract until smooth.
  
Add in the nuts and mix until it's dough-like. Press the mixture into and up the sides of the lined bowl and chill in refrigerator while you make the almond cream.
 
For the Almond Cream:
1 cup cashews
1/3 cup almond milk
1/3 cup coconut oil, melted
3 tablespoons maple syrup
1 1/2 teaspoons pure almond extract
2 tablespoons chopped almonds
The maple syrup is missing from the photo, but don't worry, I remembered to add it!
Blend all but the chopped almonds until smooth, then fold in the chopped almonds and spread the mixture evenly on top of the cake layer.
  
Mine was way too thin to do this at first because I added extra almond milk, so I just poured it into the center and as it chilled and firmed up I was able to spread it up and along the sides.
 
Once the almond cream layer has chilled and is set, then it's ready for the final component.

For the chocolate cream:
3/4 cup almond milk
1/2 cup cashews
1/2 cup walnuts
3-4 tablespoons cocoa powder (original recipe uses "cacao" and carob powder)
3 tablespoons maple syrup
1/2 teaspoon pure vanilla extract (original recipe calls for 1/2 of a vanilla bean)
pinch of sea salt
2 tablespoons coconut oil, melted (original recipe also uses cacao butter)
In blender, combine all ingredients except the coconut oil and mix until smooth and creamy. Add coconut oil and blend until thoroughly combined. It will be similar in consistency to chocolate pudding. Pour mixture over almond cream to fill in the center of the bowl.
 
Allow to chill in the freezer for a few hours or the refrigerator overnight. When ready to eat, just turn the bowl upside down on a plate and remove.
  
Then peel off the plastic wrap, slice, and serve. I've been keeping mine in the refrigerator, but I think it would do equally well in the freezer if you prefer a frozen, ice cream cake type dessert.

Monday, December 27, 2010

Mini Lemon Tarts

I found another recipe I wanted to try courtesy of my Epicurious iPhone app. This one is vegan, gluten-free, and raw. I usually really like raw desserts, so when I saw Lemon Pudding Filled Coconut Cupcakes with Shaved Coconut Topping I was practically drooling just reading over it.
I made mine in a mini-muffin tin and didn't have enough coconut left to top them, so they are more like tarts than cupcakes, but they're still super yummy. I also didn't have any agave nectar on hand, so I used maple syrup instead. Apologies for not having any pictures of the beginning steps for this recipe, as I only took photos of the assembly, but these are really easy to make in a food processor.

Lemon Pudding filling

1/3 cup cashews
1 1/2 bananas
1/4 cup lemon juice (from 1 to 2 lemons)
2 tablespoons agave nectar (I subbed pure maple syrup)

Grind cashews into a powder in food processor. Add the bananas, lemon juice, and maple syrup and process until smooth. Let chill in the refrigerator.

Cupcakes/tart shells

2 1/2 cups dry pecans
1/2 cup shredded coconut
1/8 teaspoon sea salt
3/4 cup firmly packed pitted dates
3 tablespoons alcohol-free vanilla extract 

One thing about raw recipes, don't ignore the "alcohol-free" detail when it comes to using vanilla extract. Trust me on this one. As it happened, I didn't have any alcohol-free vanilla extract, so I used 2 tsp of my pure vanilla extract and 2 tablespoons plus a teaspoon of water.

Combine the pecans, coconut, and salt in the food processor and process into evenly sized small pieces, taking care not to overprocess into a butter. Scoop the mixture into another bowl. Combine the dates and vanilla in the food processor and process into small pieces. Return the pecan mixture to the food processor and pulse to mix. It should have a crumbly but sticky texture.
 
I put mine in the refrigerator overnight, and then it was nice and cold when I was ready to use it. The recipe says to use a cupcake pan, but I wasn't sure how rich these would be so I decided to use a mini-muffin tin to make them more bite-sized. I don't think removal would be an issue either way, but I lined mine with some festive mini-muffin baking cups.
 
I used my measuring spoon to put a teaspoon of the cupcake/tart shell mixture in each, then used the back of it to press it into the cavity.
  
I then added another teaspoon to the top and used the flat top of my spurtleto press the mixture deeper into the bottom of the cup and up the sides. I had to use my fingers to tidy the tops and make sure the sides were evenly distributed.
 
I used a clear plastic disposable piping bagto add the lemon filling. 
  
Then the mini tarts got to sit in the fridge for a few hours to chill and firm up. 
 
I think the filling was supposed to set up more than it did. For some reason, my filling stayed pretty runny even after it chilled in the refrigerator overnight, so I maybe added too much lemon juice or something, but I'll figure that out on the next round.
The recipe was supposed to only make 6 standard-size muffins, but I got nearly 18 mini tarts. You're also supposed to top them with more coconut, but I didn't do that. Apparently the filling keeps for a few days in the refrigerator when stored separately, and the cupcakes/tart mixture will keep for several weeks. Keep the assembled tarts in the fridge and use within a few days. If they last that long. Making these bite-sized seemed like a good idea at the time for portion control, but I find myself snacking on them.

Wednesday, June 16, 2010

Fresh Peach Cobbler (raw)

A few months ago a friend of mine shared a raw cobbler recipe with me. It originally called for mango, but they were out of season and too expensive. Or perhaps at the time I just couldn't be bothered to peel and dice them or something. So, I used strawberries because they were on hand, and since my kids love them, I thought it would be a treat the whole family could enjoy. Well, it wasn't. Once strawberries are washed and sliced, they just don't stay fresh for very long. Since this is a raw recipe, those berries were looking pretty pathetic after only a few hours in the refrigerator, and while it tasted fine, it wasn't all that great or pretty to look at.

More recently, I found some mangoes on sale, so I bought them and followed the recipe to the letter (almost). I've come to the conclusion that while I love the flavor of mangoes, I hate the texture of their stringy, slippery, pulp. Plus they're a pain to prep, and I didn't particularly like them in this recipe.

Last weekend, I scored some awesome peaches at the Farmers Market. BINGO! I may have to get some more peaches this weekend and make this recipe again because what I made yesterday will be gone by in the morning.

So, here is the recipe for Fresh Mango Cobbler, only made with peaches instead because that's the way I like it. I'm really sorry I don't have good pictures for this one. The photo below really does not do it justice.


Fresh Peach Cobbler (Raw)

Crust:
3 cups dry pecans
1 TBSP alcohol-free vanilla extract
3/4 tsp. sea salt
3/4 cup pitted dates

Syrup:
3/4 cup pitted dates
3 TBSP coconut oil
1/2 TBSP alcohol-free vanilla extract
2/3 cup water, as needed

Filling:
6 cups fresh peach slices (the actual number of peaches needed will vary depending on variety and size)
juice of one lemon (freshly squeezed, of course)

Peel, pit, and slice peaches. Place them in a large bowl and add the lemon juice. Refrigerate while making the crust and syrup.

Process pecans and salt into a powder in food processor. Add vanilla extract and 3/4 cup dates and continue processing until mixed well. Spread half of this crust mixture into the bottom of a pie dish and set aside, reserving the other half in a small bowl for topping.

Process the other 3/4 cup dates with oil, vanilla, and water as needed to make a thick syrup. Pour onto peaches and gently stir to combine. Spoon filling into pie dish and top with the rest of the crust mixture.

Cover and keep refrigerated.

Pin It