Showing posts with label cupcakes. Show all posts

Friday, March 9, 2012

Luau Tiki Men Cupcakes

Every year about this time the Scholastic Book Fair comes to my kid's school. For an entire week, the library turns into a book store, all decked out according to the theme. This year it's a Luau.

I'm happy to support the book fair because it benefits the school and encourages kids to read. I've even picked up some choice finds in years past. That's where I acquired Hello, Cupcake! and What's New Cupcake? but I was really excited to see Bakerella's Cake Pops book on the shelf this year.

I volunteered to bring sweet treats, and since I've been telling everybody to buy Bakerella's book I probably should've made cake pops. I thought about trying to make little tiki men shaped cake pops, but I wasn't convinced it would work, and cake pops take a lot of time.

So I decided to make mini cupcakes. You can usually get at least 72 out of a box of cake mix, so they're great for feeding a crowd. I used a box of Duncan Hines Confetti cake mix and got 78 micro cakes. I only have one mini-muffin pan, so I had to bake the batter in batches, but that gave me time in between to work on the decorations.

Not really sure how to decorate them, and totally lacking imagination, I went with the design printed on the book fair flyers. Here's what I was going for. Or, at least something similar.
To make the tiki men, I formed chocolate fondant into a log shape, and then rolled it into a snake. I then cut it into (roughly) 3/4" segments. It's best to work on them one at a time, and you'll need to keep the spares covered so they don't dry out before you get to them. Using modeling tools, my assistant and I made tiki faces in each segment and left them to dry. We used a dog bone tool (small end) to make the eye indentations, a pointed modeling stick for the eyes, the thin end of a veining tool to make the nose, and a small spatula to make the forehead marks and mouths. But really, you could do all that with the tip of your pinky, a toothpick, and a pointy spatula. I also posted a tutorial demonstrating how to make these on CakesDecor.com
I also made small green leaves and blossoms out of a gum paste and pre-colored rolled fondant blend using plunger cutters. The blossom centers are sugar pearls, and I used an angled offset spatula to make small vein marks on the leaves. These can be made days in advance.
To assemble, I piped white buttercream on the top of each cupcake, using a tip #12 on some and a tip #21 on the others. Immediately after, I dipped the cupcake edges in brown sugar to look like sand. Again, it's best to work with them one at a time so the icing doesn't crust before you get the cupcake edges dipped in the brown sugar. Also, sometimes brown sugar is sticky and likes to clump up, depending on the humidity. If that's an issue, mix in some regular sugar to help break it up. Then, I positioned a tiki, some blossoms, and a couple of leaves on the top.
I figured out, quite by accident when I got a glob of buttercream on a tiki and then wiped it away, that you can highlight the features and details by smearing a little icing across it. This white buttercream makes a nice contrast on the chocolate fondant. But, I didn't really have the time to do them all that way, so I left the rest plain.
Since these are mini cupcakes, they might be a bit top heavy, especially the ones that get a little more full because their tops are bigger. Also, some of the tiki men wanted to lean, so the blossoms and leaves help prop them up.
The thing about making the tiki guys by hand is that they all come out looking a little bit different, and they were so much fun to make! I have more pictures, possibly with an obscure reference or two, posted on photobucket.

Pin It

Thursday, February 16, 2012

Betty Crocker Gluten Free Cake Mix and Easy Cupcake Decorating

If you didn't already know, Betty Crocker does gluten-free cake, cookie, and brownie mixes now. Actually, these have been around for a while, but I'm honestly not a fan of Betty Crocker. Or cake mixes in general for that matter. But if I have to use a cake mix, I'm more than likely not going to eat it, so I usually go for Duncan Hines if it's on sale or Pillsbury, whichever is cheaper.

A few days ago I realized that February is half over and I hadn't posted anything since January, so I decided to try out the box of Betty Crocker Gluten Free Devil's Food cake mix that had been sitting in my pantry for many weeks. I bought it on sale to use for something, I forget what, that I obviously never used it for. I was also in the mood for something chocolate. And easy. Cupcakes made from a mix are quick and easy.
This is a standard-size box of cake mix, yet it only makes a single cake layer or 12 cupcakes. So, not only is it twice the price of regular cake mix because it's gluten free, but it only yields half as much. That's really more like it being 4 times the price, when you think of it. Those of us on a gluten-free diet who want the occasional treat must pay dearly for it--either out of pocket for the gluten-free version or in misery if we indulge in the real thing.
Other than the smaller yield and the use of butter instead of oil, the method is the same as regular cake mix. Add 3 eggs, a cup of water, and a stick of softened butter.
Make sure the butter is really soft, or maybe even think about melting it. I say this because despite my stick of butter sitting out on the counter all morning, it still wasn't soft enough to properly blend into the mix. The super cool thing about cake mixes, though, is that they're really hard to mess up. So, these cupcakes came out fine except for little holes on the surface of some of the cupcakes. But icing covers stuff like that up anyway.
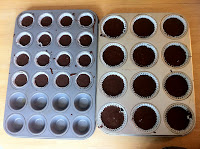
The batter easily filled my all 12 cavities in my cupcake pan, and I had batter left over. I didn't want to over fill the cupcakes, so I spooned the extra into my mini-muffin pan. I ended up with 12 cupcakes and 16 mini cupcakes. The little ones turned out to be the perfect size for taste testing, and most of them were gone before I managed to get any icing made.
The cupcakes overall came out really dark, and the centers mounded up while the edges didn't rise much. When I bake cupcakes from a regular box of cake mix the tops usually come out flatter. I will say that the texture is pretty good. It's spongy rather than crumbly, and these cupcakes are more dense and dry than the light, moist texture you get with regular cake mix. Still, for gluten-free baked goods, they have a nice texture, and it's not at all grainy.
Unfortunately, they don't taste that great. They're super sweet and not very chocolaty. These cupcakes really just smell more like chocolate cake than taste like it. If you notice from the picture showing the box side, the first ingredient in this cake mix is sugar. Gluten is bad, especially for those of us with intolerances, but sugar is evil. And these cupcakes have more sugar in them than anything else.
To compensate for the lack of chocolate flavor, and since I didn't want to add any more sweet in the way of a sugary frosting, I decided to make some ganache for icing. I went for a vegan version (I used almond milk), because my body doesn't like for me to consume a lot of dairy.
I dipped a few cupcakes in the warm ganache to give them a smooth, shiny top. I loved the look of them, but I quickly abandoned that method because it involved removing the paper baking cup, which leaves the sides and bottoms of the cupcakes exposed and likely to dry out. So, we ate those first.
Once the ganache had cooled, I beat it with a whisk to make it more fluffy and frosting-like so I could use it to ice the rest of the cupcakes. On some I piped the icing with a #1M tip. For the others I used tip #12 and then smoothed the ganache with a spatula. I uploaded videos to my YouTube page if you'd like to see how I did it.
 
Then I made some rolled fondant roses using various easy techniques, as well as simple blossom flowers and leaves using plunger cutters to decorate the cupcakes with. I also posted those videos to YouTube, so please let me know what you think.

Pin It

Saturday, October 1, 2011

Stuff I made for the school bake sale...

I suffer from ongoing internet connection issues. This is a recurring problem that has never been truly resolved, mainly because the company that I pay to provide me with internet service doesn't really care if I have it consistently or not because they get paid either way. But I'm not going to go off on my Comcast rant here. All you really need to know is that last week we were without internet for a few days.

Not able to waste my hours perusing the web, I had some time on my hands, so I made a bunch of stuff for the school bake sale. Since it was to take place before the homecoming football game, I used a lot of blue and yellow, which are the school colors. I baked two 9x13 sheet cakes, one chocolate and one yellow. Both from a mix, sorry guys. When they were cool, I torted them and then cut them into quarters, giving me eight 4x6 layers of each flavor.

I made two football fields, which honestly didn't turn out all that great because it was trickier to pipe all the yard lines on such a small cake than I anticipated. But the footballs came out okay. I made them from chocolate candy coating. You just pipe the outline with melted chocolate and then fill it in similar to the color flow technique, only easier and the pieces aren't quite as fragile. And they taste better.
On the first cake, I was having trouble getting green to spread properly on the chocolate icing, so I piped the field with a grass tip. That made the yard lines impossible to get straight, which is why the second cake looks tidier. I was trying to do a cheerleader pompom thing in the corners using a grass tip and piping bag striped with blue and yellow, but the fact I had way more blue than yellow in the bag is obvious on the second cake. Same for the two-tone beaded border.

While I was in internet limbo I practiced making gum paste flowers. I recently acquired some seriously cool new daisy cutters, you see, so I was grasping at any excuse to play with them. I also had new gum paste I wanted to try out. And I can always use practice making roses. The roses, gerbera daisies, and leaves are all made from Choco-Pan gum paste. With a healthy dose of my beloved Super Pearl applied.
I only used two layers for the football fields, but I made the rest of these cakes with three layers, and I wanted a yellow cake to have chocolate icing. I decided to put the flowers on those cakes because I liked the way the colors of the roses and daisies contrasted with the dark brown of the chocolate icing. I also made two "gift package" cakes with the remaining 4x6 layers. They both looked pretty much the same: blue and yellow gum paste bow loops, lightly dusted with Super Pearl, and blue and yellow blossoms. I think I put strawberry jam filling in between the layers of the yellow cake.
Oh, and I also made cupcakes, using yellow cake mix. I needed something to put my smaller gum paste flowers, leaves, and bows on. The footballs and wildcats (school mascot) were made using melted candy coating. Just make sure to use oil-based candy colors if you decided to color the white candy. My son decorated the smiley face cupcakes, and he added a blue icing filling in keeping with the school colors theme.
Here's a better look... I made the primrose-looking flowers using a blossom cutter and Wilton's Flower Impression Mat Set.
I ended up with a few larger wildcats and some footballs left over, but they got put to good use because both of my kids decided decorate a cake for the bake sale. One went for a more 3-D effect, with the wildcat propped up by the football.
The other cake had footballs flanking the sides. They both wanted to use blue icing and have strawberry filling in between the layers.
I had a lot of fun with the melted candy. It's my new favorite technique, I think. I'm definitely going to need to play around with it a bit more to make sure. The Whimsical Bakehouse outlines the method really well. Don't worry locals, it will be back at the library in a few days.


Pin It

Tuesday, September 20, 2011

Gluten-Free Cupcakes (with chocolate icing)

I finally tried the Very Vanilla Cupcakes recipe in Elana Amsterdam's Gluten Free Almond Flour Cookbook. I've been wanting to make them ever since I got the book, but for one reason or another I just didn't get around to it. Probably because I usually end up making her chocolate chip cookies, which are exceedingly addictive and rarely last more than a few days around our house, if that long.
I get my almond flour from Honeyville. It's not cheap, so I've been waiting for them to have a sale or send out a coupon code, which they recently did. Today is the last day to take advantage of the coupon code, by the way! Enter PATRIOT at checkout for a 15% discount.

Once I had my new 5 pound bag of almond flour ordered and knew it was on its way, I decided to go ahead and use up the remnants of my current bag. Only, there was just over a cup left, and nearly all the recipes called for 2 cups or more. And I really wanted to make these cupcakes. So, reasoning that if the recipe made 10-12 cupcakes, I figured that half the recipe would make 5 or 6, which was a safer quantity for me to have on hand.
Halving the recipe wasn't the only change I made. I also subbed coconut oil for the grapeseed oil, and used maple syrup instead of agave nectar. I tend to always do that whenever I make one of her recipes. I'm not all that crazy about agave nectar, and I always have coconut oil on hand, whereas I rarely buy grapeseed oil. I didn't take pictures of the ingredients or recipe in process, and for that I apologize. But I do have photos of the finished product.

Very Vanilla Cupcakes, as I made them. For the original, full recipe, double the quantities and don't use the substitutions mentioned above.

1 large egg separated
1/8 cup/2 tablespoons coconut oil
1/4 cup maple syrup
1/2 tablespoon vanilla extract
1/2 tablespoon freshly squeezed lemon juice
1 1/4 cups blanched almond flour
1/4 teaspoon sea salt
1/4 teaspoon baking soda

Preheat the oven to 350 degrees and line the cavities of a standard muffin pan with paper baking cups.

Using an electric mixerwhisk the egg yolk until pale. This is easier said than done when using a counter top mixer because a single yolk really isn't enough for the beater to do anything with, so that's a lesson learned. Beat in the coconut oil, maple syrup, vanilla, and lemon juice.

In another, clean and totally grease-free mixer bowl, whisk the egg white until still peaks form. Gently fold the egg white into the yolk mixture.

Combine the almond flour, baking soda, and salt in yet another bowl--yes, that's three mixing bowls I dirtied for just 6 cupcakes. I must have REALLY wanted some cupcakes, because I hate washing dishes. Gently fold the dry ingredients into the egg mixture, and evenly divide the batter between the muffin cups. Bake for 20-30 minutes, until golden brown and a toothpick comes out clean. Allow to cool completely before icing. Oh, and the centers will sink. It says so in the book, so that's nothing I did wrong.
I made the chocolate frosting recipe also in Elana Amsterdam's book, as that's what she recommends icing these cupcakes with, and I'm a big fan of white cake with chocolate icing. Again, I made my usual substitutions, as well as used 60% cacao chocolate chips (her recipe calls for 73% cacao chocolate) since that was the darkest chocolate I had on hand.
 

Chocolate Frosting (I made the full recipe because I wanted leftovers)
1 cup dark chocolate chips
1/2 cup coconut oil
2 tablespoons maple syrup
1 tablespoon vanilla extract
pinch of salt

Melt the chocolate with the coconut oil until smooth, then stir in the maple syrup, vanilla, and salt. Allow the chocolate to chill in the freezer for 10-15 minutes (don't forget about it!) and then beat with an electric mixer for a couple of minutes until it thickens and starts to look like frosting.

I filled a disposable piping bag with it, snipped of the end, and used that to ice the cupcakes. I knew this icing would be really rich, and I'm not a fan of the mile-high frosting mound that's so popular on cupcakes now, so I opted for no piping tip over the large star #1M I typically use. This way I could ice the cupcakes with just enough frosting. Store any leftovers in the refrigerator, but know that the icing will set up and harden, so leave the cupcakes out for a few minutes at room temperature before serving.


Overall, these came out okay. Almond flour is going to give you a coarser crumb than all purpose or cake flour, so I was ready for that. They actually taste a lot like the cookies in cupcake form. Considering how similar the recipes are, I suppose that's to be expected. I'll fess up and admit that I didn't test the cupcakes for doneness with a toothpick. I just saw that they were a lovely golden color and assumed they were ready. I think they could've used another 5 minutes baking time, though, because they're so moist that they're a bit gooey. Next time I'm making the full recipe.


Honeyville Gluten Free Almond Flour


Pin It