Showing posts with label ganache. Show all posts

Friday, March 25, 2011

Mud Pie: Gluten-Free Chocolate Tart Topped With Almond Pastry Cream

Have I mentioned how much I love the Whole Foods recipe iPhone app? My most recent experiment was based on the Apricot Tart in Quinoa-Almond Crust recipe I found on there, which is also available on the website.

I had some leftover quinoa flour I needed to use up, so this seemed like a good recipe to try. Of course, I was missing a few of the key ingredients, namely evaporated cane juice and apricots, so instead I made some ganache with coconut milk and dark chocolate for the tart filling and used the pastry cream as a topping. I'm always in the mood for chocolate.
It worked out pretty well, except I used Rapadura to make the pastry cream in lieu of evaporated cane juice, and it gave the pastry cream a horrible greenish-brown mud color. So I called it a mud pie. I don't have step-by-step photos for this recipe because I made the ganache and pastry cream after dark, ad you guys already know about the lighting issues in my kitchen. Plus, how the heck am I supposed to take pictures while making pastry cream? That stuff requires both hands and due attention. Anyway, here is the recipe as I made it.

For the crust:
1 cup quinoa flour
1/2 cup almond flour (I used Honeyville)
1/4 cup sugar
1/2 teaspoon xanthan gum
1/4 teaspoon salt
1/2 cup (1 stick) unsalted butter, at room temperature and cut into small pieces
1 egg yolk
Place quinoa flour, almond flour, sugar, xanthan gum, and salt in the bowl of a food processor. Add butter and process until the mixture resembles coarse meal, 8 to 10 seconds.
 
At which point, mine looked like the photo on the left, so I processed it  a few more seconds, until it looked like the picture on the right.
  
Add egg yolk and pulse until dough holds together, without being wet or sticky. That's what the recipe says, anyway, but mine stayed a little sticky.
  
Flatten dough into a disk on a sheet of wax paper, then wrap it up and let it chill for at least an hour.
 
When well chilled, roll dough into a 12-inch round on a lightly floured surface (I used what little quinoa flour I had left for this). The dough was still a bit sticky and tricky to work with, and I had trouble with it falling apart as I tried to put it in my 9-inch loose-bottomed tart pan, so I ended up pressing it in the pan. It then needs to chill for another 30 minutes before baking at 400 degrees for 15 minutes, or until bottom is dry and tart shell is golden brown. The recipe says to prick the bottom with a fork, which I did, but I didn't use any pie weights. Allow crust to cool completely before adding filling.

While it's cooling, you can make the ganache and pastry cream. The ganache is easy, just melt a bag of dark chocolate chips, I used Ghirardelli 60%, add a can of coconut milk, and stir until smooth. Let it chill in the refrigerator, and it will thicken up nicely.
The pastry cream is a little more involved, but well worth the effort. I used:
1 cup almond milk
1/4 cup Rapadura
2 egg yolks
2 tablespoons cornstarch
1/4 teaspoon pure almond extract
1/4 teaspoon pure vanilla extract
1 tablespoon butter

Over medium heat, stir almond milk and 2 tablespoons of the Rapadura in a small saucepan until it starts to simmer. In another bowl, whisk the egg yolks, remaining Rapadura, and cornstarch until pale yellow. Slowly add half of almond milk to egg-yolks, whisking constantly. This tempers the egg yolks so they won't curdle. Pour everything back into the saucepan. Still working over medium heat, bring the mixture to a boil while whisking constantly. Once the mixture comes to a boil, continue whisking vigorously until it thickens, about 1 minute. Remove pan from heat and stir in almond extract and butter. Allow it to cool completely. Like I said, my pastry cream isn't the most appetizing color, so I think next time I may try making this recipe with maple syrup instead of the Rapadura.
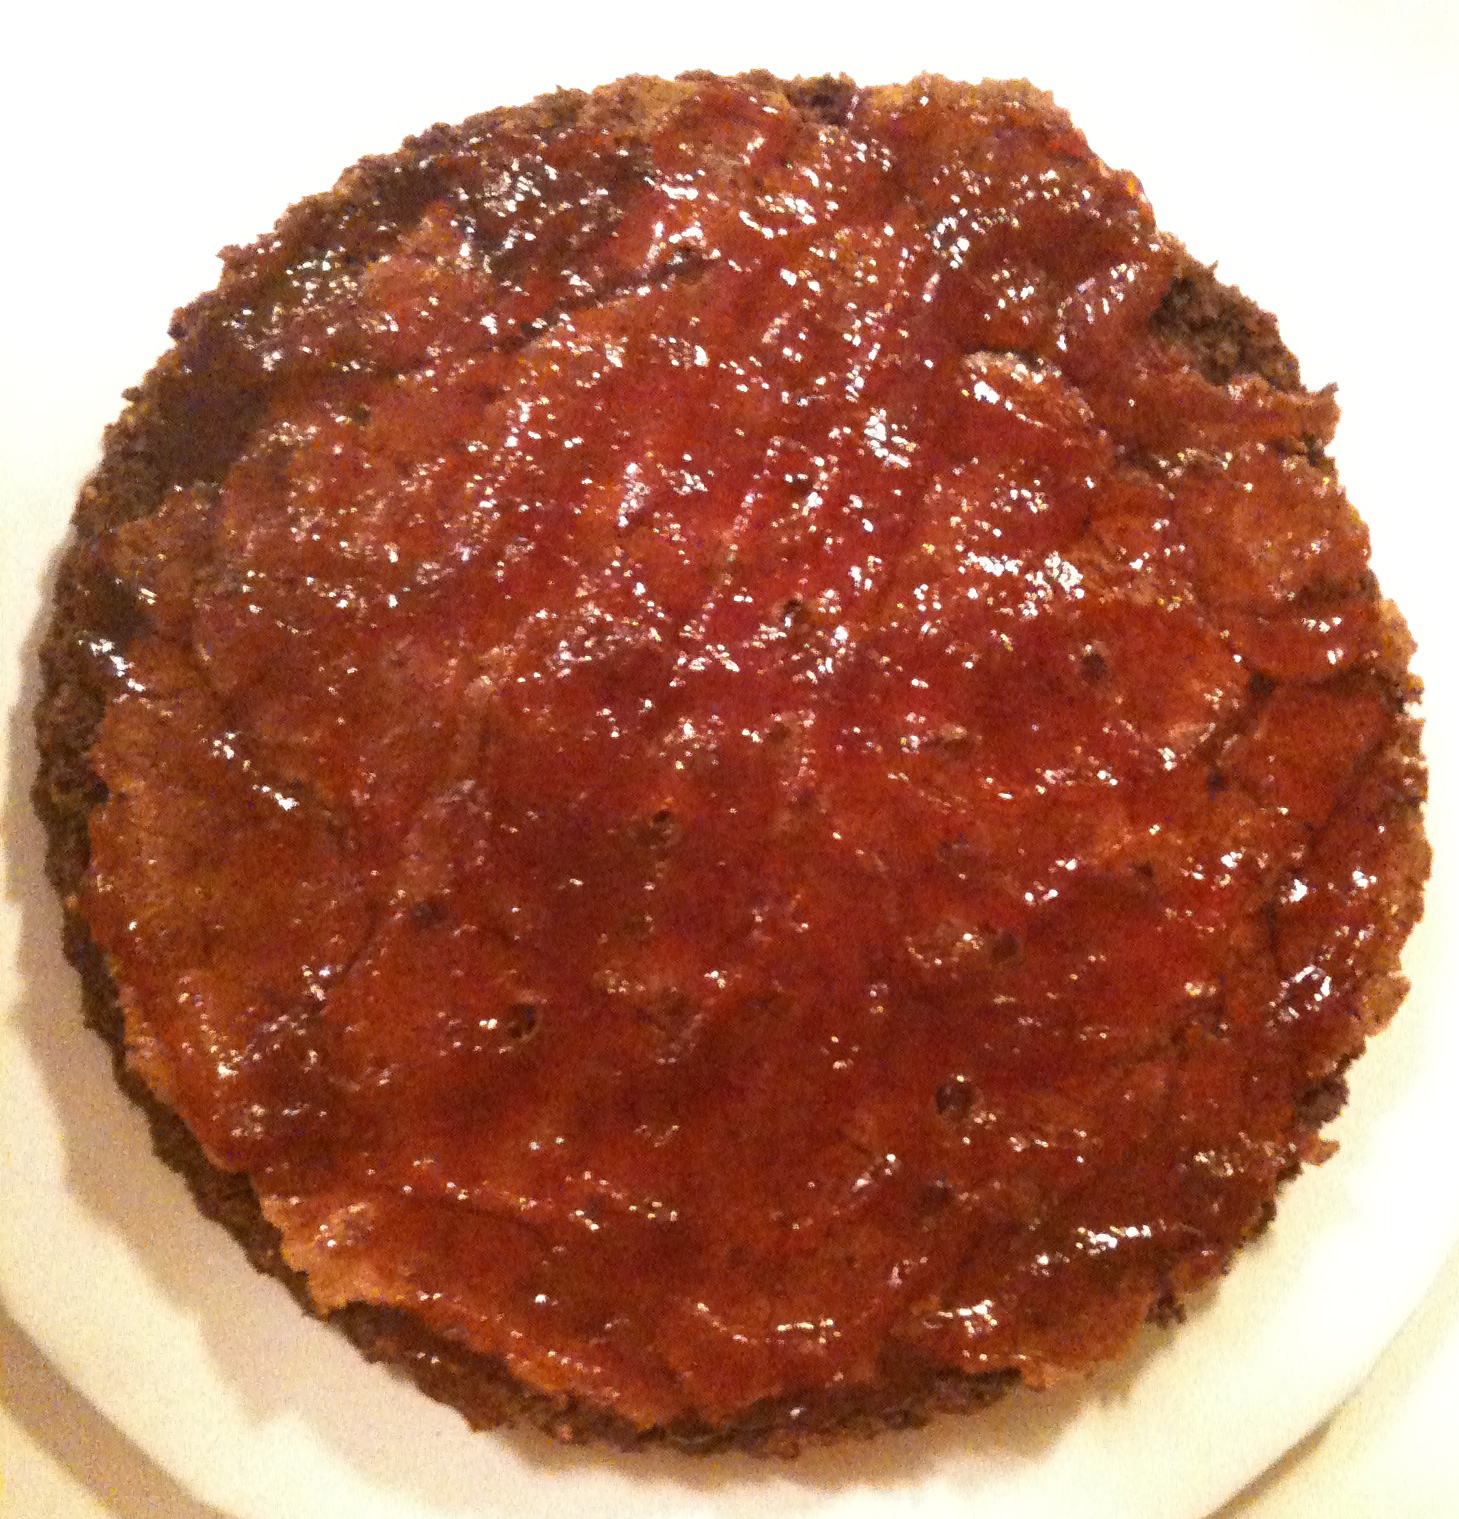
When everything is cooked, baked, and cooled--in my case the following morning so I could have enough light to take photos--then fillings can be added to the tart crust. Since the chocolate was a lot thicker and heavier than the pastry cream, I spread that on the shell first, then added the pastry cream as a topping. Yum.
  
Here are more photos of the crust and filling once the tart had chilled for a while after the final assembly. Apart from the odd color of the pastry cream, I'm really happy with how this recipe came out. The crust is more like a cookie base than a flaky pastry, as one would expect with a fruit tart, which this was intended to be. The pastry cream is light and sweet, very similar in consistency to pudding, and the chocolate is awesome.
  
I won't lie, the quinoa flour does leave a bit of its flavor behind. It's not so much an aftertaste as more of a flavor undertone, but if you didn't know the quinoa flour was in there you might not even notice it. I'm glad I tried this recipe, as I think the crust could be used with a variety of sweet fillings. I may try it again with a different flour and see how it does.

Sunday, November 7, 2010

Chocolate Torte Dressed in Berries

CAKE! That would be a moist, dense chocolate cake with yummy strawberries covered in a rich ganache. I've been wanting to make this recipe ever since seeing it in The New InterCourses: An Aphrodisiac Cookbook (a word of warning here, since this is a family-friendly blog: this book contains tasteful photographs of people wearing food. I wouldn't call it nudity, as their relevant bits are covered up, but the pictures are consistent with the book's overall theme).

This recipe is for a flourless cake, so it's already gluten free, and I didn't bother to try and sub out the sugar because it's been a while since I've made something like this. A wee bit of butter and sugar from time to time is fine, in moderation of course. We all need our guilty pleasures.

For the Chocolate Torte:

1 cup toasted almonds, finely chopped
6 tablespoons cocoa powder
2/3 cup unsalted butter, softened
1 cup sugar
1/4 cup brown sugar
4 large eggs
1 teaspoon vanilla
1/2 cup chopped fresh strawberries
1/2 cup strawberry preserves

Preheat oven to 350 degrees and grease an 8 or 9 inch springform pan. Since I still don't HAVE a springform pan (any bakeware companies that want to send me one to review please feel free!) I used my 11-inch loose-bottomed tart pan.

Combine almonds and cocoa powder in small bowl. Place butter and sugars in mixer bowl and cream until light and fluffy.

Beat in eggs (one at a time) and add vanilla.


Fold in almond-cocoa mixture and strawberries.


Spread into pan and bake about 40 minutes, or until toothpick comes out clean. It might be a good idea to put the cake pan on a cookie sheet, just in case there's any seepage.


Cool completely and remove sides of pan. Mine got a bit messed up around the edges from where the cake stuck to some areas of the tart ring, but that's easily covered up.


This cake is VERY moist and likely to fall apart, so leave it on the pan base and place it on a serving plate. Spread the top with the strawberry preserves.

Now, for the ganache topping you'll need:

1/4 cup heavy cream (I used coconut milk because I need it to be dairy free)
6 ounces high quality dark chocolate, finely chopped (I used 60%)


Bring cream/coconut milk just to boiling in a small saucepan. Remove from heat and add chocolate, stirring until smooth. Pour ganache onto cake and spread over top. I had enough to also ice the sides, thereby covering up the tattered edges.

Decorate with strawberry slices and mint sprigs (which I didn't have, so I didn't use). Chill until serving.


Here's what it looks like on the inside. It's very moist. chocolaty, and gooey. A super easy recipe that's delicious. How awesome.

Saturday, April 24, 2010

Elvis Cupcakes

How can I not be totally in love with a blog called Legalize Frostitution? I first heard about the  Cupcake Royale bakery while listening to The Splendid Table. As the Sterns described the Velvet Elvis cupcake, I thought it sounded like a genius idea, only I needed it to be gluten-free.

I had grand plans to make these as healthy as possible by substituting unsalted, pureed garbanzo beans with 1 cup of the flour, using agave nectar or maple syrup instead of sugar, and replacing the butter with coconut oil. Unfortunately, when I made that batch I forgot to add the maple syrup. The inedible result took the fast track to the trash. 

With my only can of unsalted garbanzo beans gone, I had to go with a gluten-free baking mix for round two. I also went ahead and used raw sugar because I was afraid maple syrup would make the batter too runny, and I didn't want another disaster.

I'm much happier with these, but I do apologize for the out of season baking cups. I kinda had to go with what I had on hand for the second batch. And hey, Halloween is only 6 months away. Just around the corner, really.


Banana Cupcakes, adapted from Martha Stewart.

1 1/2 cups gluten-free baking mix of choice
3/4 tsp xanthan gum
3/4 cup raw sugar 
1 tsp baking powder
1/2 tsp baking soda
pinch of salt
1/2 cup coconut oil
3 large, very ripe bananas
2 large eggs
1/2 tsp pure vanilla extract

Preheat oven to 350 degrees and line a standard muffin pan with gold lame baking cups. 

Whisk together the baking mix, xanthan gum, sugar, baking powder, baking soda, and salt until well combined. In a blender, puree the bananas with the eggs, vanilla, coconut oil. Add the wet ingredients to the dry and stir to incorporate, but don't over mix. Spoon into prepared pan while humming "Heartbreak Hotel." 

Bake for 25-30 minutes. Allow to cool completely on a wire rack. Makes 12.

Peanut Butter Icing, adapted from Ina Garten

1 cup powdered sugar (Sorry about this, guys. If I had used agave nectar the icing would have been way to thin.)
1 cup creamy peanut butter (I use the all natural kind that requires stirring up before use.)
1/2 cup coconut oil
3/4 tsp. pure vanilla extract
1/4 tsp salt

Mix together until creamy. I had to refrigerate mine before using to help it firm up. Since I use all natural peanut butter, it was pretty runny. If you use regular peanut butter, then the stabilizers will probably help with icing consistency. 

I iced half of the cupcakes with the peanut butter icing and poured chocolate ganache over top. This was messy. If I decide to do these again I think I'll unwrap the cupcakes, turn them upside down, frost the top, then glaze the whole thing like a petit four. You can tell it took me a few goes to get it right.


With the other half, I waited for the ganache to firm up and then used it as a filling for the cupcakes before icing the tops.


What? You don't believe there's really chocolate filling in there? Very well. O, ye of little faith. Sorry it's blurry. The sky was darkening due to severe weather moving in at the time, so the lighting was all off. Hey, I'll take my excuses anywhere I can find them.


Oh, yeah. I suppose I better tell you how to make the ganache, right? It's the same recipe I used for chocolate truffle filling only I left out the vanilla.

Ganache:

1 cup coconut milk
16 ounces good quality chocolate

Melt chocolate using your method of choice (microwave, double boiler). Add coconut milk and stir until smooth. Allow to cool before using as a glaze, otherwise it will melt the peanut butter icing right off the cupcake tops (read: lesson learned the hard way). If using as a filling, chill it in the refrigerator until it starts to cool and thicken. You'll just have to keep checking on it, but you want it to be the consistency of chocolate pudding, maybe a little bit thicker. 

I think the filled cupcakes look better, but that's a big glob of chocolate ganache filling to bite into! For taste, I prefer the chocolate glazed cupcakes as they're not quite so rich. Next time I think I'll try making them as mini-cupcakes and see what happens.

Want tips on how to fill and frost cupcakes? Check out my Chocolate Cupcakes post. They have Spider-Man baking cups.

Saturday, August 23, 2008

Chocolate Cupcakes

I seem to be on a baking binge lately, which is not so much a compulsion but a diversion from the more mundane--yet desperately needing to be done--household tasks such as cleaning. This explains why my house is so incredibly filthy but smells good.

Knowing that I'll need a kick-butt chocolate cake for the State Fair in a couple of weeks, I decided to nose around for a recipe to try. I thought the chocolate peanut butter cake on smitten kitchen looked especially yummy. It's actually a sour cream chocolate cake, which was handy as I had a tub of sour cream in the refrigerator stamped with a sell-by date of 8-24-08.I decided to make cupcakes because they are mobile and easily disposed of. I have to say, this recipe is almost too easy to make, and I honestly thought I had done something horribly wrong because I wasn't prepared for the batter's lack of viscousness. However, it baked just fine.
 

I would just like to quickly point out that if you choose to use patterned baking cups and actually want the ability to discern the design on your finished product, only bake a light-colored batter in them. Case in point, Spider-Man just barely shows up over the chocolate.

So, what did I do with all those cupcakes? I had some sour cream left, so I made the sour cream chocolate icing recipe from my copy of The Cake Mix Doctor. It came out a bit softer than usual, so I decided to use it as filling for the cupcakes. This is when a Bismark (#230) tip becomes a very useful thing to have around. Here they are with the filling just peeking out from the tops.
  
Still needing an icing for these cupcakes was a good enough excuse to make a ganache. Well, that and the left over heavy cream in the fridge for which I otherwise had no use for. I love the shine of ganache in the morning. Once the ganache cooled sufficiently and was thick enough to pipe, I iced the cupcakes with a tip #1M.
Here is the finished cupcake sliced in half to show the filling. I love how dark and rich this cake is. The recipe called for Dutch-Process cocoa powder, which for some reason has become very difficult to find. I didn't have any in my pantry, so I just used the regular Hershey's I had on hand, and it seems to have done the job just fine. Yum!